How to flash Tasmota firmware on a ESP device with a relay switch? How do you remote the ESP online? You will find out on this tutorial.
All you need are:
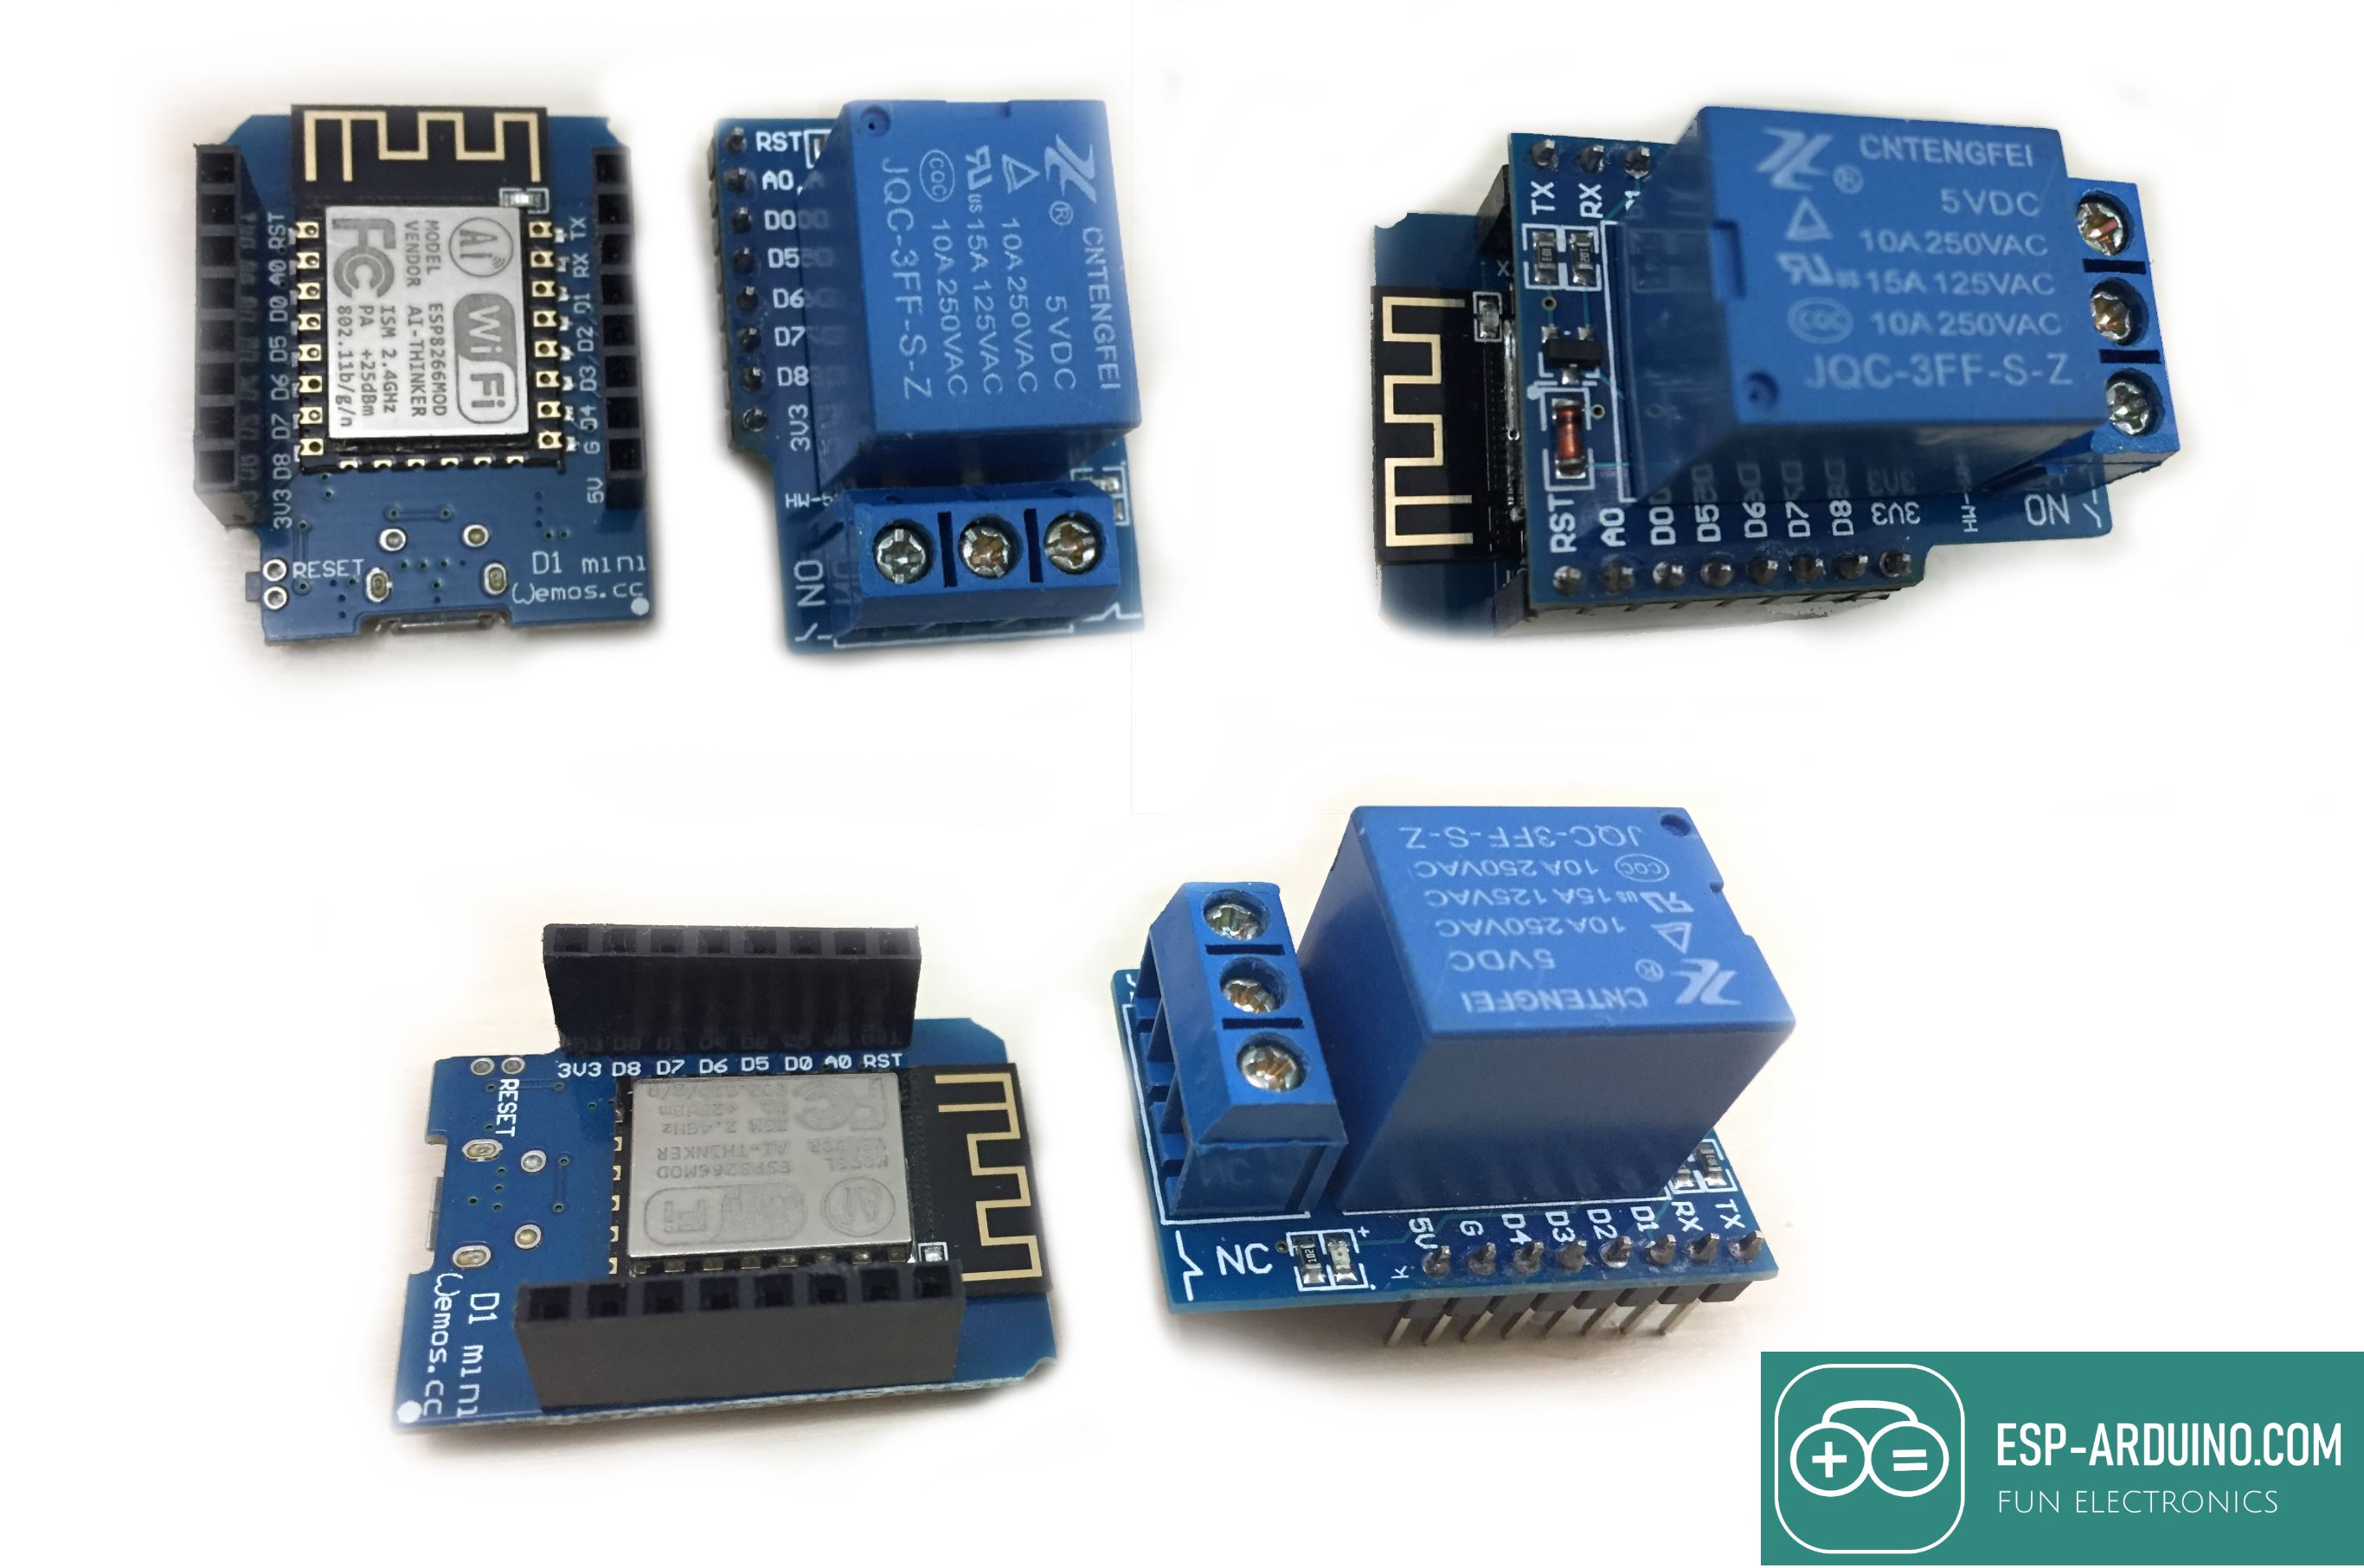
- Wemos module
- Wemos relay module
- Tasmota firware and esp tool
- Arduino app
Flash Tasmota on Wemos ESP
- Get the port number. Connect wemos to your computer. Open Arduino app to get the port number.
- Download the firmware and ESP tool. Double click the file flash_tasmota_8.1.0.bat to run the program. Type the port number of wemos and press Enter. It should start to flash. Once finished, disconnect and reconnect wemos to your computer.
- Connect ESP to your network. Open Arduino app and on menu, click Tools >> Port and select the port number. Again click Tools and this time click Serial Monitor. Type ssid your_wifi_name and press Enter. Next type password your_wifi_password and press Enter. Your ESP should connect to your network and an IP Address will be displayed.
Configure Tasmota Module
Once your ESP is connected to your network, we can now configure the proper module for your ESP and set up the GPIO pins.
Setting-up ESP GPIO pins
- Open your browser and enter the IP Address of your ESP in the address bar. Click Configuration >> Configure Module and click Module type drop-down box. Scroll down and select Generic 18 and click save.
- Again click Configuration >> Configure Module. Now you configure the GPIO pins according to your ESP setup. I am using Wemos Relay, and the pin of this relay is GPIO5. So I will assign Relay 1(21) on D1 GPIO5 and click save.
- Now you can turn on and off the Wemos relay switch.
Remote ESP Tasmota online
To control the ESP anywhere online, we can use the free service of Smartnest. Although its limited to 5 devices its kind a useful.
Adding device on Smartnest
- You have to register first.
- Once logged, go to My devices and add new device. Enter a name and select type as Switch.
- Get the device ID. Click View and copy the ID.
- Get the API Key. Click My account and there you will find the api key.
- Keep these two details. These are all we need to integrate our Tasmota in Smartnest.
Integrate Tasmota on Smartnest
Now we have to configure the Tasmota MQTT. So back on your device tasmota web interface, click Configuration >> Configure MQTT and enter the following details:
- Host: smartnest.cz
- Port: 1883
- Client: [Device ID from Smartnest]
- User: [Your smartnest user name]
- Password: [Smartnest API key or your Smartnest password]
- Topic: [Device ID from Smartnest]
- Full Topic: %topic%/%prefix%/
Click save and go to Console.
If you see the MQTT is connected, it means you done it right. Congratulation.
From now on, you can control your device either by Smartnest web interface for by App. You can also integrate Smartnest to Alexa or Google home.
For detailed tutorial, please visit this link:
How to install Tasmota on Wemos relay and integrate to Smartnest